
Setting granite countertops is not a single-day event — it is a complete sequence that runs 10 to 15 business days from templating through a finished, sealed installation. The process includes: an on-site templating visit (90 to 120 minutes), 10 to 14 business days of shop fabrication, and a 4 to 6 hour installation day where crews dry-fit every section, apply structural epoxy adhesive, set seams with color-matched epoxy, and finish edges with silicone caulk. Standard 3cm granite weighs 18 to 20 pounds per square foot, making professional installers and suction cup lifters non-negotiable for safety. Homeowners should wait 24 hours after installation before resuming normal countertop use.
Setting granite countertops is a complete fabrication-to-installation sequence — not a single afternoon project. The full process runs 10 to 15 business days from the templating visit to a finished, sealed kitchen, with installation day itself taking 4 to 6 hours. For Central Texas homeowners planning a kitchen or bathroom countertop replacement, understanding every stage before you commit to a fabricator is the difference between asking the right questions and signing a contract you'll regret. This guide covers all six stages: cabinet prep, templating, shop fabrication, delivery, physical placement with epoxy adhesive, and sealing. At each step, we'll flag what separates a quality installation from a cut-rate one.

Removing existing countertops and confirming cabinet leveling is the first physical task that must be complete before any granite work begins. Old countertops — laminate, tile, or solid surface — need to be fully out of the space so the install crew arrives to a clean installation area ready for stone. Move small appliances off the counter runs, cover nearby furniture you want to protect, and clear a path through hallways and doorways the crew will use to carry heavy slab sections.
Uneven cabinets are one of the leading causes of cracked granite after installation. Base cabinets must sit level within 1/8 inch across the entire cabinet run. If there are low spots, installers use shims to create a stable, level surface before the slab ever arrives. Catching this before template day saves you from expensive mistakes that are impossible to undo once stone is bonded in place — a slab seated on an uneven cabinet top will flex under its own weight and develop stress cracks over time.
Check every section of the cabinet perimeter with a 4-foot spirit level. Run it lengthwise, widthwise, and diagonally across corners. Composite shims (not wood, which compresses and rots) go under cabinet bases at low points. This takes 20 to 30 minutes and is the single most preventable cause of structural concerns after installation. If you're replacing countertops in a home with older cabinets, this check often uncovers settling that's been hidden under the old surface for years.
$25–$60
Checks cabinet leveling across the full run before templating — catches problems that would crack granite after bonding
$8–$15/pack
Used to level low spots on cabinet tops before the slab arrives; composite shims don't compress or rot over time
Do not remove the sink or disconnect plumbing until the morning of installation day. Your plumber reconnects the undermount sink after the countertop is set and the adhesive has cured — coordinate that timing in advance so you're not without water for more than one day.
Templating is the most critical step in the entire granite installation process — errors here carry forward into every cut, every seam, and every edge profile on the finished stone. A templating technician visits your home and captures exact cabinet dimensions, wall angles (which are almost never perfectly square), sink cutout specs, faucet holes, cooktop openings, and overhang requirements. This is also when seam placement is decided, so the technician needs to see the full layout in person.
Physical overlay templating — where a technician traces the exact cabinet perimeter onto rigid template material — takes 90 to 120 minutes on-site. Digital laser templating using systems like the Prodim or LT-55 cuts that to 30 to 45 minutes and feeds measurements directly into CNC machines at the shop, reducing transcription errors significantly. At Fox Granite, we use the overlay template method, giving our fabricators a physical reference that travels with the slab through every stage of shop production.
Seam placement is a fabrication decision that gets locked in at templating — once CNC machines start cutting to those specs, the plan is set. The rule that protects you: seams must sit at least 6 inches from any inside corner. Any seam placed closer is a fabrication defect. Inside corners concentrate stress, and a seam at that location will eventually crack — predictably, along the seam line. A good fabricator walks you through the seam plan and shows you exactly where joins will be visible before a single cut is made. If a fabricator can't explain their seam placement logic, that's a problem to address before you sign off.
Have your sink, faucet, and any cooktop model numbers ready on template day. Cutout dimensions vary by manufacturer, and a technician who has to estimate will either schedule a return visit or cut to the wrong spec — both cost you time and potentially money.
Fabrication is the shop phase where your template becomes finished stone countertops. CNC machines cut the slab to exact dimensions, then edge profiling gives the finished edges their final shape. Standard residential granite is 3cm thick — approximately 1.25 inches — which is the industry norm for structural stability without underlayment. A typical granite slab weighs 18 to 20 pounds per square foot, so a 30 sq ft kitchen layout is already 540 to 600 pounds of stone before it leaves the shop. A large kitchen with an island at 65 sq ft reaches 1,080 pounds or more.
Edge profiles are cut in this phase: eased, beveled, bullnose, half-bullnose, ogee, and others. The choice is aesthetic, but the precision is non-negotiable — a poorly executed ogee or bullnose profile is visible every time you stand at the counter. Sink cutouts, faucet holes, and cooktop openings are also cut at this stage using the template specs. CNC machines produce cuts that manual wet-saw work cannot match for complex layouts and tight tolerances. Color-matched epoxy is mixed and used to fill any natural fissures in the stone before polishing, keeping grain patterns consistent across the surface.
Professional sealing is applied at the shop in quality fabrication operations, giving the penetrating granite sealer adequate cure time before the slab is handled and transported. Ask your fabricator to confirm this was done. Properly sealed granite arrives at your home ready to resist stains from day one — you won't need to wait additional days for sealer protection. Plan to reseal kitchen granite every 1 to 2 years; the water-drop test tells you when it's time without guessing.
Shop-owned — not a homeowner purchase
State-of-the-art stone-cutting software produces precise cuts and smooth finished edges that manual tools cannot replicate for complex kitchen layouts
Fabrication runs 10 to 14 business days from template to delivery-ready slab. Plan your kitchen downtime around that window. Most homeowners are without a fully functional sink and countertops for 2 to 3 weeks total when you include templating scheduling and post-install cure time.
By the time granite arrives at your home, the kitchen must be fully cleared and ready for the install crew. Old countertops fully removed, base cabinets confirmed level, small appliances moved out of the installation area, and nearby furniture protected or relocated away from the work path. The team will be maneuvering heavy stone sections through doorways and hallways — a clear path is not a courtesy, it's a safety requirement.
Most granite arrives in sections rather than as one continuous piece. Professional installers use suction cup lifters and specific carrying techniques to move each piece safely through the home. A crew of at least two people is required for even a small kitchen; larger sections need three or four. This is a clear dividing line between DIY installation and professional installation. The weight alone creates serious injury risk and slab-shattering risk if a piece tips or drops — and a shattered natural stone slab cannot be repaired. It has to be remade at full cost.
When the team arrives, they check each slab section against the template for accuracy before any adhesive is applied. Verify measurements, inspect for chips or damage from transport, and confirm the grain patterns read the way you expected when you selected the slab at the showroom. This is your last clear look before permanent placement begins. Note any concerns now — once the adhesive is mixed and applied, the window to adjust closes fast.
Do not attempt to carry granite sections without professional equipment and an experienced crew. A standard kitchen section of 15 sq ft weighs 270 to 300 pounds. Dropping a slab causes serious injury and shatters stone that cannot be repaired — it has to be remade from scratch.
Every slab section gets dry-fitted before any adhesive is applied — this is the step that separates flawless countertop installations from expensive callbacks. Experienced installers position each piece on the cabinet tops, verify seam alignment, check that edges are perfectly flush and level across the full run, and make any minor adjustments with shims. Problems caught at dry-fit cost nothing to fix. Problems discovered after bonding cost a full slab remake, new materials, and lost labor time.
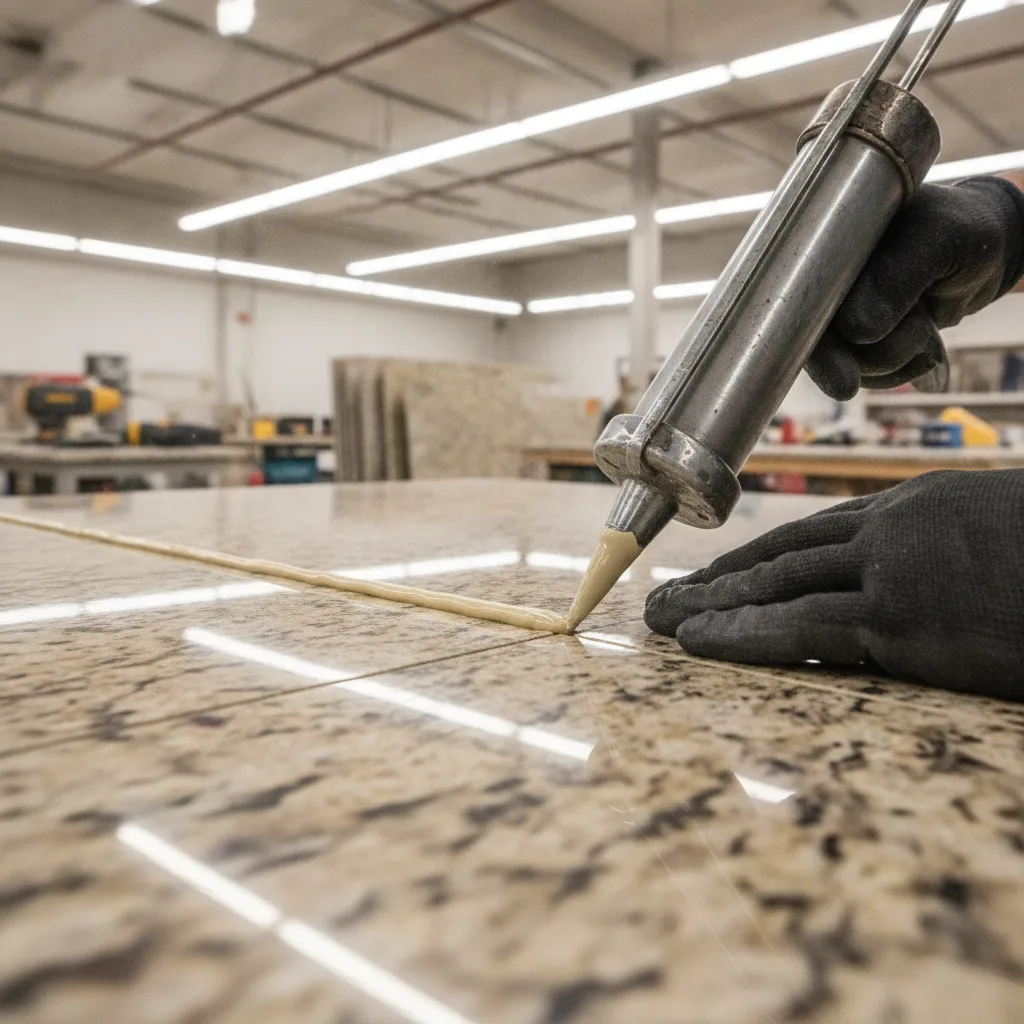
Once the dry fit confirms everything sits correctly, bonding begins. Construction adhesive — a two-part epoxy (resin plus hardener) — is applied in continuous beads along the cabinet perimeter and cabinet tops, creating a waterproof bond between the stone and the base cabinets. Liquid Nails and similar products are sometimes used for lighter stone sections, but structural epoxy is the standard for granite because it handles the weight load and resists moisture over decades. Silicone caulk serves a different role: it seals the joint between the countertop and wall, fills gaps at backsplash transitions, and seals around the undermount sink cutout. The two products are not interchangeable — using silicone where structural epoxy is required is a failure waiting to happen.
At seams where multiple slabs meet, installers apply color-matched epoxy — mixed to match the stone's background color — then press the seam edges together and wipe away excess epoxy with acetone before it sets. Per Marble Institute of America guidelines, finished seams must be no wider than 1/16 inch. Good seam work is nearly invisible; poor seam work is permanently visible. After the slab reaches final position, clamps hold the seams firmly while the adhesive sets. Any excess epoxy is cleaned immediately — once it cures, removal risks scratching the polished stone surface.
If an installer skips the dry-fit step and goes straight to adhesive, that is a red flag. The dry fit takes 20 to 30 minutes per section and is not optional on a quality installation. It is the checkpoint that prevents costly mistakes from becoming permanent ones.
After the granite countertops are bonded and seams have set, the installation process moves to finishing details: backsplash installation if included, caulking along all wall transitions, and cleanup of any residue from the installation area. A granite backsplash ties the countertop to the wall cleanly and protects the wall surface from moisture and water damage over years of daily kitchen use. Silicone caulk — not grout — goes at the joint between the countertop surface and the backsplash. Silicone is flexible, allowing minor movement without cracking; grout is rigid and will crack at that joint within a year.
Undermount sink installation happens in this phase if it wasn't pre-mounted at the shop. The sink clips to the underside of the countertop cutout and is sealed with silicone caulk around the full perimeter. Your plumber then reconnects faucets, supply lines, dishwasher connections, and drain connections after the countertop is fully bonded. That's typically a same-day visit coordinated around the install crew's departure — confirm the schedule with your plumber before installation day so both trades aren't waiting on each other.
The install crew walks you through the finished work before they leave. Check seam visibility, verify all finished edges are smooth and clean, confirm the countertop sits level and stable, and review care instructions for your new granite counters. Wait 24 hours before resuming normal countertop use — 24 to 48 hours before placing heavy items or running water through the sink. That window lets the adhesive and silicone fully cure. After that, your new granite is ready for decades of daily use.
$8–$15/tube
Seals backsplash transitions, sink perimeters, and wall gaps with a flexible, waterproof bead that moves with the stone without cracking
Test your granite sealer annually using the water-drop method: place a tablespoon of water on the surface and wait 15 minutes. If the water beads, the sealer is holding. If it soaks in and darkens the stone, it's time to reseal. Most kitchen granite needs resealing every 1 to 2 years.

Every section of granite should be dry-fitted — positioned without adhesive — before bonding starts. This is non-negotiable on a quality installation. Skipping it to save 20 minutes is how a fabricator ends up with a bonded slab that doesn't align at the seam or sits proud at one end. Once epoxy cures, the only fix is a full slab remake. Ask any fabricator you're considering whether they dry-fit before bonding. The answer tells you a lot about how they work — and whether your investment lasts as long as granite should.
When setting granite countertops is done right — cabinets level, template accurate, fabrication precise, dry-fit completed, seams color-matched and clamped, stone properly sealed — you get a natural stone surface that handles daily kitchen life for decades without structural concerns or visible problems. The process takes 2 to 3 weeks. The result lasts 30 or more. For granite countertop installation in Austin, San Antonio, New Braunfels, and throughout the Central Texas corridor, Fox Granite handles every stage in-house — templating, fabrication, edge profiling, sealing, and professional installation — with no subcontractors and no surprise fees. Contact us today to schedule your free in-home consultation and get your free estimate.
Ready to get started? Contact Fox Granite today.


BY APPOINTMENT ONLY
1379 Wald Road
New Braunfels, TX 78132
Austin, San Antonio, Cedar Park, Kyle, New Braunfels, Del Valle, Elgin, Lago Vista, Shady Hollow, Onion Creek, Buda, San Marcos, Lockhart, Temple, Wimberley, Dripping Springs, Bee Cave, Lakeway, Leander, Anderson Mill, Jollyville, Spicewood Springs, Round Rock, Georgetown, Pflugerville, Manor, Taylor, Manchaca, Mountain City, Hutto, West Lake Hills, Bastrop, Liberty Hill, Driftwood, Sun City, Steiner Ranch.