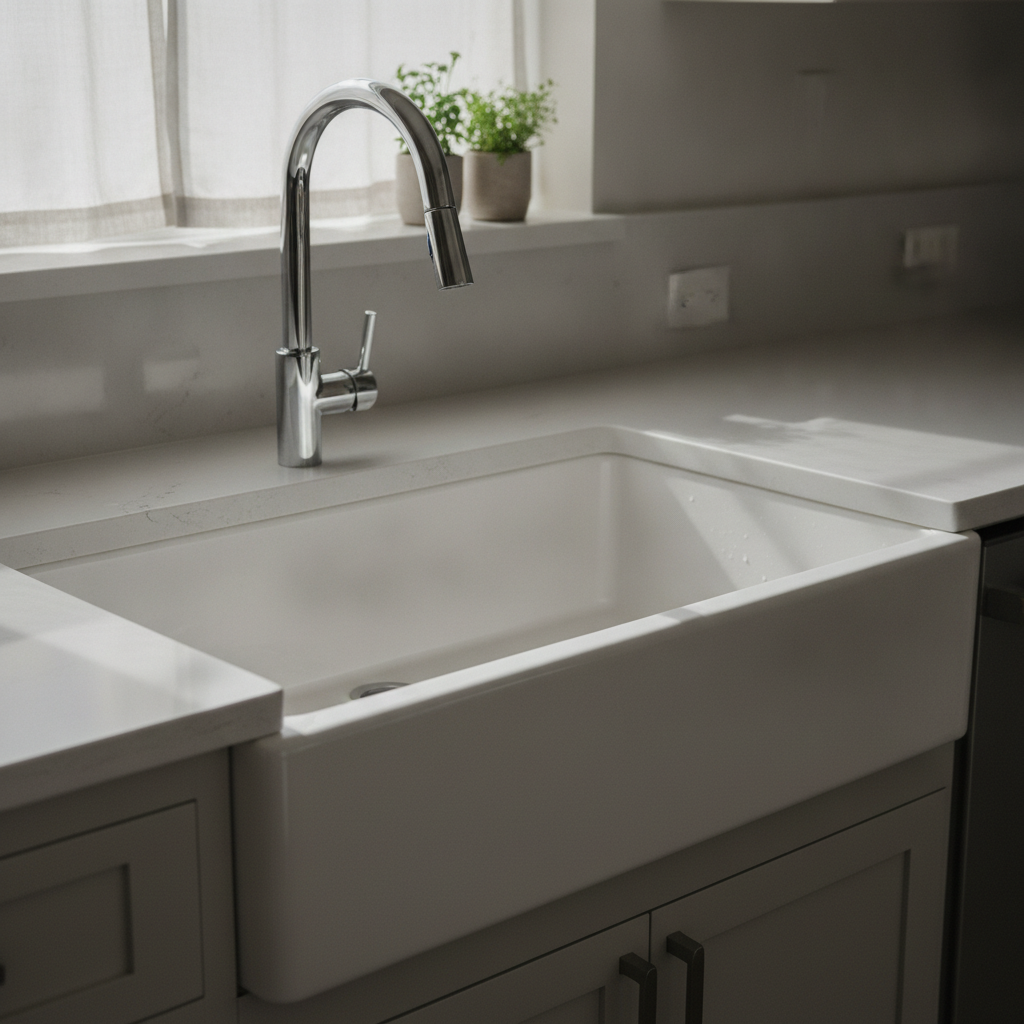
Installing a farmhouse (apron-front) sink with a quartz countertop requires four parties aligned before a single cut is made: the homeowner or designer, the cabinet maker, the countertop fabricator, and the plumber. The cabinet face frame must be modified and a 2x4 support frame built inside the sink base before templating. The quartz cutout adds $150 to $400 over a standard undermount cutout, and the reveal setback (1/8 to 3/16 inch proud of the apron face) must be agreed on in writing before fabrication. Never cut quartz in place — a diamond-blade wet saw, hazardous silica dust, and a high slab-crack risk make this professional-only work. Total project timeline runs 2 to 4 weeks from coordination to live sink.
Installing a farmhouse sink with a quartz countertop is one of the most requested kitchen renovation combinations in Central Texas as of 2026 — and one of the most frequently botched. Quartz holds 39% of the U.S. countertop market, and apron-front sinks have become the default choice in higher-end kitchen remodels. The problem: most homeowners plan it like a standard undermount swap. It is not. This is a four-party coordination project with a strict sequence, irreversible cuts, and a $150 to $400 upcharge for the farmhouse cutout alone — before edge polishing, faucet holes, or cabinet work. Get the sequence right and this project finishes in 2 to 4 weeks. Get it wrong and you're paying a re-template fee at minimum, or scrapping a fabricated slab at worst. This guide walks you through every step — and every decision you need to make before anyone picks up a tool.

Learning how to install a farmhouse sink with a quartz countertop starts not with tools, but with a shared timeline among four parties: the homeowner or designer, the cabinet maker, the countertop fabricator, and the sink installer. Elkay's official installation guide makes this explicit — if one party works off incomplete information, the others inherit the mistake. The most expensive version of this: a countertop fabricator arrives to template, the cabinet face frame hasn't been modified yet, and the template has to be redone at a $75 to $150 re-template fee. Skipping this coordination step is the number-one way a straightforward kitchen renovation turns into a weeks-long delay.
Bring your actual sink on-site before any coordination meeting — this is not optional. A 30-inch fireclay farmhouse sink that arrives at 29.4 inches changes your cabinet cut and your quartz cutout. No cabinet maker or countertop fabricator should mark a cut line based on the spec sheet from the sink manufacturer. Have the physical sink present and measure it at every appointment. Cast iron farmhouse sinks carry the same caveat — measure what arrived, not what was advertised. Assuming the dimensions are correct without checking is how you end up paying for a re-template.
At this coordination stage, decide three things in writing with your fabricator: (1) the reveal setback, meaning how far the countertop overhangs the apron face; (2) faucet hole count and placement; and (3) the edge profile on the exposed front countertop edge above the sink. These decisions cannot be undone after fabrication. Changing any one of them means re-cutting stone and paying for it again. Write all three into your quote confirmation before you sign. A great fabricator team will walk you through photos or physical samples so you can feel confident in each choice before work begins.
The re-template fee ($75 to $150) is the cheapest consequence of poor coordination. A countertop cut in the wrong location — or a cabinet opening that doesn't match the actual sink — can mean scrapping a fabricated slab worth hundreds or thousands of dollars. Get all four parties on a shared written timeline before anyone picks up a tool.
A new farmhouse sink requires removing the front horizontal stretcher rail — the cross-member at the top of the sink base cabinet's face frame — before countertop templating. This is step one for your cabinet maker, and it must happen before the fabricator's templating visit. If the face frame is still intact when the fabricator arrives, the template will be wrong, and the re-template fee comes out of your budget. The cabinet maker should also double check that the existing cabinet walls are plumb and the opening is square — an out-of-square opening of more than 1/4 inch will require shimming and a custom support plan. Clear the work area inside the cabinet base completely before the cabinet maker starts: remove all stored supplies, hardware, and cleaning products.
Once the face frame is cut and the apron front opening is clear, a dedicated support frame must be built inside the cabinet base. Fireclay farmhouse sinks weigh 85 to 100-plus pounds empty. A cast iron farmhouse sink can weigh even more. Fill one with water and dishes and the load on the cabinet reaches up to 300 pounds — an extremely heavy load that the quartz countertop is not designed to carry. A 2x4 support frame or manufacturer-approved ledger system built into the cabinet walls is mandatory. Construction screws (not wood glue alone) hold the frame tight to the cabinet sides. Some fabricators also use plywood platforms when the cabinet base needs a reinforced floor. The sink sits on this frame, not on the countertop or the quartz edge.
Dry-fit the actual sink into the modified cabinet before the fabricator arrives. Lower the sink carefully onto the support frame, check level in both directions, and shim as needed before applying any sealant. The sink height at this dry-fit determines the countertop reveal, and your fabricator needs that confirmed measurement at templating. Don't skip this step assuming the frame is close enough — a sink that's off by more than 1/8 inch will drain and fit incorrectly after the countertop is in place. Use composite or wood shims to fine-tune the position until the sink sits level and the apron face aligns straight with the cabinet front.
$20–$50 in materials
Required for the sink support frame inside the cabinet base — the only structure rated to hold a 300-lb filled farmhouse sink load safely
$25–$60
Confirms the support frame and dry-fit sink are level before the fabricator templates — a sink off by more than 1/8 inch will drain and seat incorrectly
$8–$15/pack
Fine-tunes sink height inside the cabinet so the reveal measurement is accurate at templating
$40–$80/sheet
Adds a structural floor layer when the existing cabinet base isn't rated for the filled sink load — common in older kitchen cabinets
After the face frame is cut and the sink is dry-fit, open and close every cabinet door and drawer in the sink base. Some door configurations require trimming or rehinging after the apron front opening is cut — hinges may need adjustment or relocation. Catch this before the countertop goes in. Fixing a cabinet door that binds against the apron after the counter is installed is a much harder job.
The standard countertop reveal setback for a farmhouse sink is 1/8 to 3/16 inch proud of the apron face — a positive reveal. That means the front countertop edge overhangs the apron front by that small amount, creating a clean visual line and a drip edge that keeps water off the apron face. This measurement must be agreed on before templating because changing it after fabrication means re-cutting stone. A negative reveal — where the apron face protrudes past the countertop edge — is less common and requires precise cabinet alignment. Confirm your preference with your fabricator using visual references, not just a verbal description, and get it in writing. Most homeowners who prefer a negative reveal are surprised to learn it requires more difficult cabinet positioning to pull off correctly.
Faucet holes are the other decision that must be finalized before the fabricator templates. Most apron front sinks, including fireclay models, have no pre-drilled faucet holes, so hole placement falls entirely on the quartz countertop. Each hole drilled into quartz costs $65 to $120. If you're planning a new faucet with a separate sprayer and soap dispenser, that could be three holes at $195 to $360 total. Decide how many holes you need and exactly where, based on the actual faucet you've purchased or selected. Your fabricator cannot guess faucet hole placement, and drilling a hole in the wrong location on a quartz slab is not fixable — not with filler, not with a patch. Take photos of your faucet hardware and bring them to the templating appointment.
Also confirm the edge profile on the front countertop edge above the sink. This is a fully exposed, water-facing edge — the countertop edge the sink overhangs on the apron front side. It must be polished and profiled in the shop before installation, because once the sink is set, that edge is no longer accessible from the front or from below. A bullnose, eased, or ogee edge profile that looks great from the front of the kitchen is the right consideration here — choose a style that matches your existing cabinetry and kitchen aesthetic. Edge polishing on this exposed run typically adds $20 to $40 per linear foot to the fabrication cost. An apron relief routing on the underside of the countertop — the curved or angled cut that lets the counter sit flush over the apron front — adds another $50 to $100. Budget both line items into your quote from the start.
A positive reveal means the countertop overhangs the apron face — the standard 1/8 to 3/16 inch setback. A negative reveal means the sink apron face protrudes past the countertop edge, creating a flush or recessed countertop look. Negative reveals are less common and require more precise cabinet alignment. Confirm your preference using a photo or physical sample — fabricators hear both terms daily, but homeowners often use them interchangeably and end up with the wrong result.
Quartz countertop templating for a farmhouse sink adds 30 to 60 minutes to a standard templating visit. The fabricator uses the overlay template method to capture the perimeter of the countertop, the exact apron front opening, the confirmed reveal setback, and the faucet hole locations. Any of these that remain undecided at the time of templating will either delay fabrication or result in a re-template fee. The countertop fabricator needs the cabinet modification complete, the sink dry-fit at final height, and all three written decisions from Step 3 in hand before the templating appointment starts. This is not the time to be wondering about edge profile style or hole count — those questions should be settled in the planning process, not on template day.
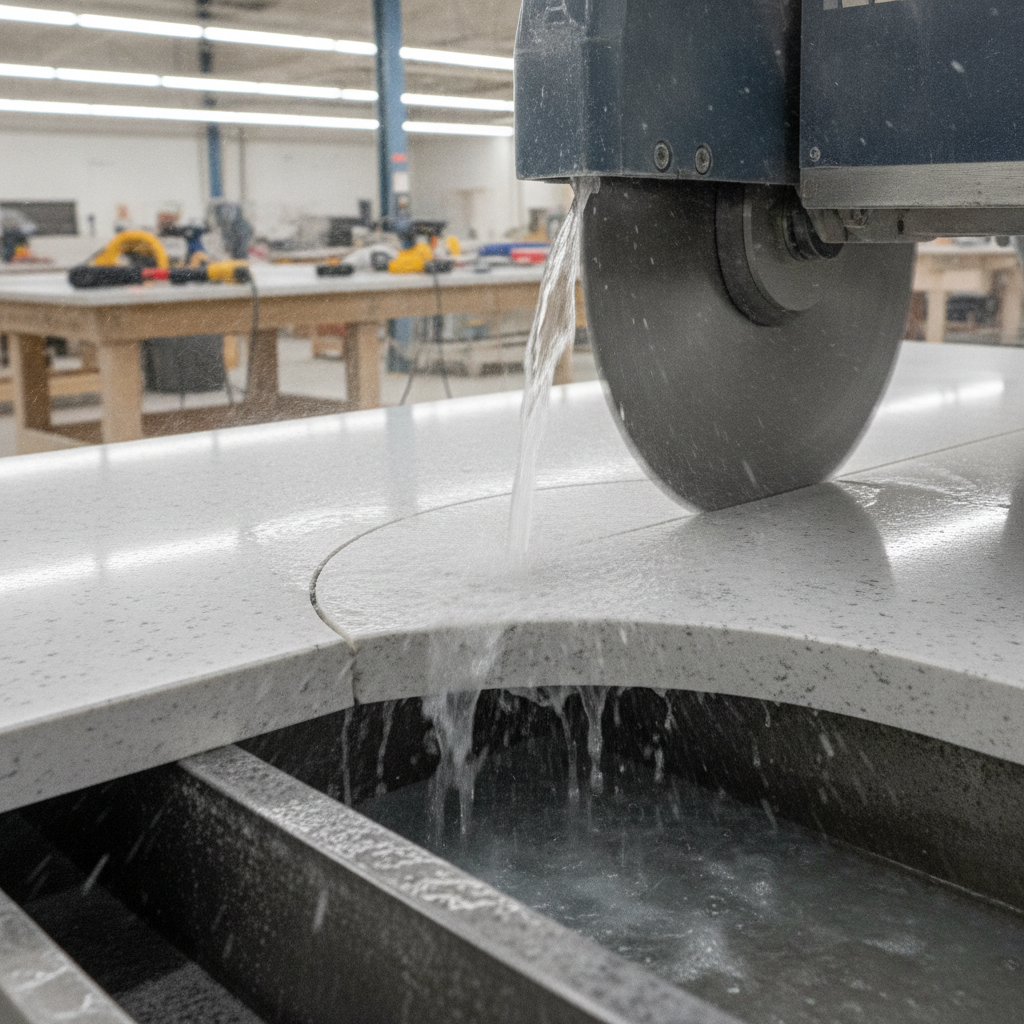
In the shop, the farmhouse cutout adds 2 to 4 hours of fabrication time compared to a standard undermount cutout. The saw work is more complex: the front countertop edge must be finished before installation because it won't be accessible after the sink is in place; the cutout must account for the apron relief on the underside; and the inside corner radii are critical. Engineered quartz manufacturers including Caesarstone require a minimum 1/4-inch router radius at all inside corners of any sink cutout — some countertop installers use 3/8 inch for harder or more brittle stone. Sharp right-angle inside corners concentrate stress and are the number-one cause of quartz cutout cracks at the sink opening. Chipping at the corners during rough-cutting is a warning sign that the fabricator is rushing. Ask your fabricator directly: what radius do you cut at inside corners? If they can't answer immediately, keep shopping for a new one.
Do not attempt to cut an existing quartz countertop yourself as a DIY project. Retrofitting a farmhouse sink into existing counters requires a diamond-blade wet saw — a circular saw will crack the slab. The process also generates hazardous silica dust classified as a health risk by OSHA. This is professional work without exception. The upcharge for a farmhouse cutout versus a standard undermount cutout runs $150 to $400 depending on stone type and edge complexity, with quartzite and thick granite at the high end. In a typical large kitchen scenario, the farmhouse cutout and support line item runs about $350, compared to $75 to $150 for a standard under-mount cutout. The cost difference is real, but it saves you from a cracked slab and a complete restart.
Included in fabrication cost
Required for all quartz sink cutouts — a standard circular saw will crack the slab and generate uncontrolled silica dust
Included in fabrication cost
Precision routing for inside corner radii and edge profiles — eliminates the stress-cracking risk that comes from hand-cut corners
A drop-in or top-mount sink replacement into existing cabinets is a plumber-level task. A farmhouse sink install into a new or existing quartz countertop is a fabricator-plus-cabinet-maker task. The two are not comparable in scope, cost, or risk. If someone quotes a farmhouse sink install at the same price as a standard undermount, ask them to itemize the cutout, edge polish, and apron relief work specifically. Countertops installed with a farmhouse cutout that skipped any of these line items tend to fail at the corners or at the sink rim within a year.
Setting a farmhouse sink into place is a two-person minimum job — do not attempt this alone. A fireclay farmhouse sink weighs 85 to 100-plus pounds empty, and you need one person to guide the apron front into the cabinet opening while the other controls the lift from above. Lower the sink carefully onto the support frame built in Step 2, check level in both directions, and shim if needed before applying any sealant. The sink rim should land at the height confirmed during the dry-fit, so the countertop reveal matches exactly what was agreed on at templating. Check the reveal from the front of the apron across the full width of the sink — an inconsistent reveal across the countertop edge is a sign the support frame needs adjustment. Wipe the underside of the countertop and the top of the sink rim with denatured alcohol before applying silicone to ensure a clean bond surface.
Mount the sink using a mechanical system: mounting clips, a rail system, or brackets with fasteners, in combination with 100% silicone sealant. Silicone alone is not a valid mounting method for undermount farmhouse sinks or any heavy sink type. Vibration from a garbage disposal and the weight of a filled sink will cause silicone-only attachments to pull away over time, leading to moisture intrusion into the cabinet base, swelling plywood walls, and mold. Apply a full perimeter bead of silicone at the sink rim, set the sink onto the frame with mechanical fasteners engaged and tightened, and wait a minimum 24-hour cure time before connecting supply lines or running any water. Use tape along the countertop edges to keep the silicone bead straight and clean — remove the tape before the silicone skins over, then use a utility knife to trim any excess once fully cured.
After the silicone cures, reconnect plumbing: water lines, water valves, the P-trap, and the drain. Disconnect and cap any old supply lines before the new ones go in — using old, corroded lines under a new sink installation is a common oversight that creates leaks within a year. If you're reusing an existing garbage disposal, confirm it clears the underside of the apron front and the cabinet walls — some disposals require repositioning when the sink base is modified for a farmhouse install. This is a common issue that your plumber or installer should scope during the planning phase, not discover during the reconnect plumbing visit. Check all joints for leaks. Run water slowly, watch every connection for 5 minutes, then check underneath before reinstalling cabinet doors.
$8–$15/tube
The only sealant compatible with quartz and stone for sink-to-countertop joints — latex caulk is not water-resistant enough for this application
$25–$60
Mechanical fastening is required alongside silicone — silicone alone fails under the weight and vibration of a filled farmhouse sink with a garbage disposal
$10–$20
Trims excess silicone bead cleanly after cure — leaves a tidy, professional joint at the sink rim and along every countertop edge
$20–$40
For tightening supply line connections and P-trap fittings during the reconnect plumbing step
Silicone needs a full 24 hours to cure before the sink carries water weight or plumbing pressure. Running water at the 6-hour mark because the joint looks dry is one of the most common homeowner mistakes — and the most avoidable. Wait the full cure time. Then do a slow water-fill test and watch the P-trap and supply line connections for 5 minutes before walking away.
After the silicone has fully cured and plumbing is reconnected, complete a full visual inspection before reinstalling cabinet doors. Check the countertop reveal above the apron front — it should be a consistent 1/8 to 3/16 inch across the full width of the sink. Check the inside corners of the quartz cutout for any hairline cracking, which can appear if the fabricator skipped the 1/4-inch minimum radius. Look at the edges of the sink from below for any gap in the silicone bead. Any gap wider than a credit card at the joint is worth re-caulking before water finds it first. Use a flashlight to get a closer view of the underside — gaps are easy to miss in the shadow of the cabinet interior. A bucket placed under the P-trap during your leak test will catch any drips and let you determine exactly where a leak starts.
Reinstall the cabinet doors, accounting for any hinge adjustments needed after the face frame modification. In many farmhouse sink installs, the cabinet doors below the sink are removed entirely and replaced with a false front panel piece that matches the apron aesthetic — a practical style choice that gives the cabinetry a cleaner, more seamless look from the front of the kitchen. Confirm this design decision was made before fabrication so the panel dimensions are built into the cabinet maker's scope. A false front is not difficult to add post-installation, but it's easier and looks more correct when it's planned from the beginning. Run the garbage disposal for 60 seconds and check for vibration-related movement at the sink rim. A sink that shifts even slightly during disposal operation has a mounting problem, not a silicone problem — go back and tighten or add mechanical fasteners rather than applying more sealant over a loose connection.
Once everything checks out, your new farmhouse sink installation is live and functional. Plan to inspect the silicone joint and the edges of the sink cutout at the 6-month mark — silicone can shrink in the first season, and a small gap at the sink rim is worth re-caulking early before water reaches the cabinet base and begins to swell the plywood or create mold. Sealing and re-caulking are the two ongoing maintenance tasks that most homeowners overlook post-installation. If you have granite countertops elsewhere in the kitchen, seal them on installation and reseal annually. Quartz is non-porous and does not require sealing, but the silicone joint at the apron front needs regular inspection every 2 to 3 years depending on cleaning product use and water exposure. Cleaning products with bleach or citrus acids accelerate silicone degradation — a consideration worth keeping in mind when choosing what you store and use under the sink.
$15–$40
Lets you inspect the full silicone bead at the sink rim from below — gaps are easy to miss in low-light conditions
$15–$30
Cabinet door hinges typically need adjustment after the face frame modification — a screwdriver handles most Blum and standard hinge adjustments without special tools
Quartz is non-porous and does not require sealing the way natural granite does. However, the silicone joint at the sink rim needs periodic inspection and re-caulking — typically every 2 to 3 years. If you have granite countertops elsewhere in the kitchen, those should be sealed on installation and resealed annually. Using the wrong sealing product on quartz can actually cause surface discoloration, so read the label before applying any sealer to your counter tops.

The two most expensive mistakes in a farmhouse sink and quartz countertop project cost nothing to prevent: skipping the four-party coordination before templating (leads to re-template fees or a miscut slab), and letting a fabricator skip the 1/4-inch inside corner radius on the cutout (the number-one cause of quartz stress cracks at the sink opening). Ask your fabricator directly: what radius do you cut at inside corners? If they can't answer immediately, keep shopping. For farmhouse sink installation with quartz, quartzite, or granite countertops in Austin, San Antonio, New Braunfels, and across Central Texas, Fox Granite handles the full coordination in-house — templating, fabrication, edge finishing, and installation — so you're not managing four separate contractors. Contact us to schedule your free in-home consultation and get a transparent, all-in estimate for your kitchen renovation.
When this process is followed in sequence — four parties aligned, cabinet modified, support frame level, countertop fabricated with correct corner radii and edge polish, sink set on mechanical fasteners with silicone cured for a full 24 hours — you end up with a farmhouse sink that looks exactly as planned and holds up for years. The project timeline runs 2 to 4 weeks. The total installed cost for a large kitchen with a farmhouse cutout, ogee edge, and two seams runs $4,500 to $8,500 as of 2026, with the farmhouse cutout and support adding approximately $350 to that total. Plan the workflow carefully, get every decision in writing before fabrication starts, and hire professionals for every cut that involves stone or significant cabinet modification. That's how a new farmhouse sink installation goes right the first time.
Ready to get started? Contact Fox Granite today.


BY APPOINTMENT ONLY
1379 Wald Road
New Braunfels, TX 78132
Austin, San Antonio, Cedar Park, Kyle, New Braunfels, Del Valle, Elgin, Lago Vista, Shady Hollow, Onion Creek, Buda, San Marcos, Lockhart, Temple, Wimberley, Dripping Springs, Bee Cave, Lakeway, Leander, Anderson Mill, Jollyville, Spicewood Springs, Round Rock, Georgetown, Pflugerville, Manor, Taylor, Manchaca, Mountain City, Hutto, West Lake Hills, Bastrop, Liberty Hill, Driftwood, Sun City, Steiner Ranch.