
Choose a granite slab in person by arriving at the slab yard with your fabricator, a cabinet door sample, a paint swatch, a floor tile, a measuring tape, a small LED flashlight, and a spray bottle. Wet each candidate slab to see its true installed color, use a raking flashlight to spot fissures and cracks, hold your physical samples against the stone in natural light, confirm the slab is large enough for your square footage plus a 15-20% waste buffer, and place a refundable deposit hold before you leave. Plan 1-2 hours minimum. Rushing this decision is the most common cause of post-installation regret on granite countertops that will last decades.
Granite slab selection is one of the few home remodel decisions you cannot make from a screen. Photos flatten color, compress veining, and hide the surface defects that determine whether a slab is a beautiful countertop or a two-week delay. The homeowners who feel best about their granite countertops — the ones who still run a hand across the stone a year later and feel good about what they chose — are almost always the ones who showed up to the slab yard prepared, brought their fabricator, packed the right tools, and took their time. This guide covers all seven steps: what to do before you arrive, how to inspect granite slabs like a fabricator, how to match granite colors to your kitchen style, and how to leave with a hold on the right piece.
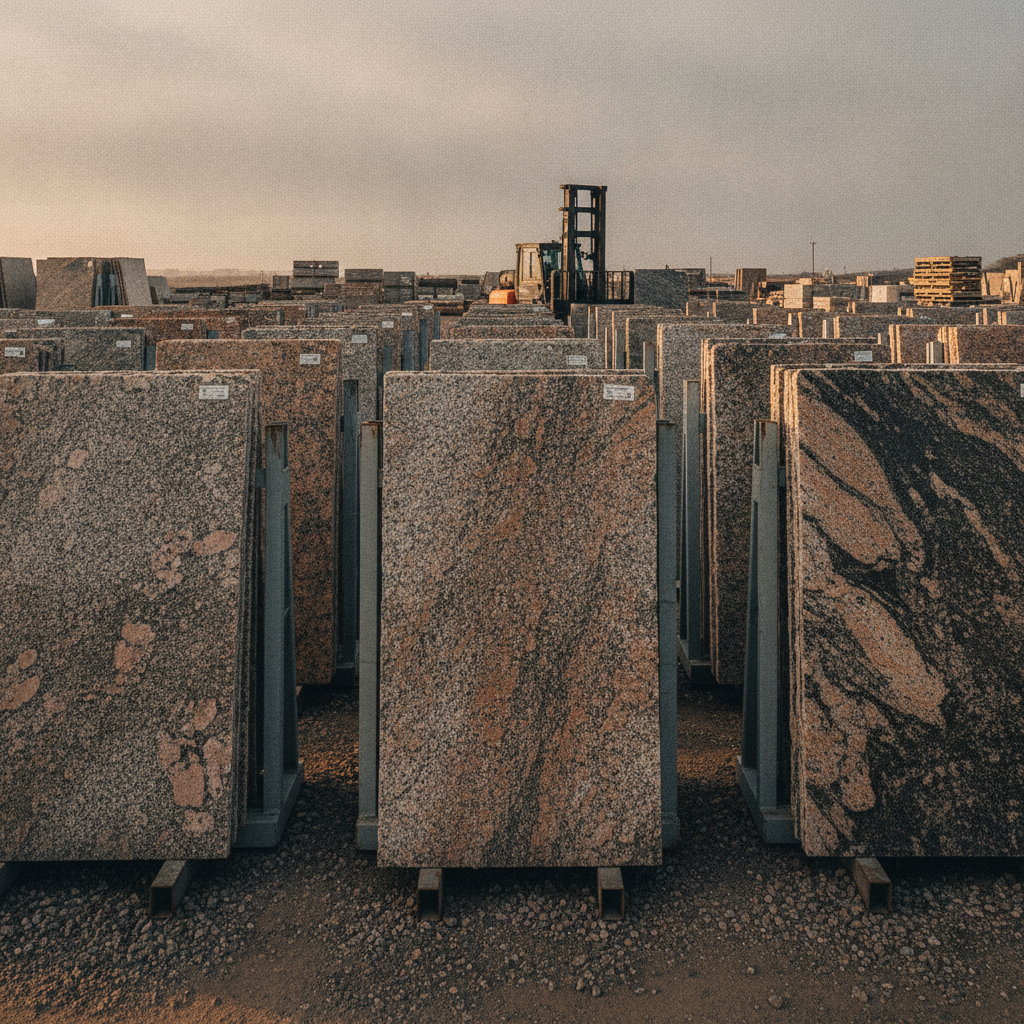
The single most important granite slab selection decision happens before you visit any yard: pick your fabricator first. Greg Fox of Fox Granite has walked through slab yards with hundreds of Central Texas homeowners and estimates that roughly 50% of the slabs he has reviewed in person had a major problem — cracks, ugly veining, or bad resin repairs. Without a fabricator alongside you, there is no one to catch those defects, and swapping a bad slab after fabrication begins costs you two to three weeks of project delay.
Your fabricator knows how your specific countertop layout maps onto a slab. They can immediately flag whether a visible crack falls inside the cutting layout or outside it, whether two slabs from the same bundle match closely enough for a large kitchen with perimeter counters and an island, and whether the stone suits your edge profile choice. A slab yard salesperson is helpful, but they cannot replicate that layout-specific knowledge.
At Fox Granite, we offer free in-home consultations before the yard visit. We review your kitchen dimensions, cabinet finish, lighting, and style so that by the time you walk into the slab yard, you already have a focused shortlist. That prep work is what separates a confident granite slab selection from an expensive guessing game.
Call the slab yard 24-48 hours before your visit and share your shortlist of granite colors. Ask them to pull the relevant bundles forward so you are not waiting on a forklift during your appointment. Most yards in the Austin and San Antonio areas are happy to accommodate scheduled visits.
Arriving at a granite slab yard without physical reference samples is one of the most common mistakes homeowners make. Photos on your phone are not reliable — screen brightness, camera white balance, and image compression all distort color. Bring the real thing: a cabinet door or drawer front, your paint swatch, and a sample of your flooring or backsplash tile. These samples let you hold granite slabs directly against your kitchen style and see whether the granite colors work with your light cabinetry or gray cabinets in actual outdoor or natural light.
Your kit should also include a measuring tape, a small LED flashlight, and a spray bottle filled with water or a damp sponge. The flashlight and spray bottle are not optional — they are the two most effective inspection tools in any slab yard. Total cost to assemble this kit is under $20 if you do not already own these items.
Wear comfortable shoes. Outdoor slab yards involve uneven ground, and you will move between rows of granite slabs stored vertically on A-frame racks. Plan for 1-2 hours minimum. Rushing slab selection is the most frequently cited cause of post-installation regret, and a great granite countertop that adds beauty and value to your home for decades is worth the time spent choosing it carefully.
Standard granite slabs run roughly 9-10 feet long by 5-6 feet wide — approximately 45-60 square feet of surface area. Jumbo slabs exceed those dimensions and can yield 60-80 or more square feet, which matters for large kitchen islands where you want to minimize seams. Before you evaluate color or patterns on any slab, pull out the measuring tape and confirm the stone is large enough for your project.
Add 15-20% to your measured countertop square footage to account for edge profile cuts, sink cutouts, and seam prep waste. A 40 square foot kitchen counter actually needs a slab with 46-48 usable square feet after that buffer. Running short on material after fabrication begins means sourcing a second slab from the same bundle — and two slabs from the same bundle can still vary noticeably in veining and color distribution.
Two standard thickness options exist: 2 cm (about 3/4 inch), which is common for bathroom vanity tops and vertical surfaces, and 3 cm (about 1.25 inches), which is the standard for kitchen countertops. Confirm the thickness matches your project spec before moving on to color evaluation. A solid granite kitchen countertop at 3 cm is significantly more durable and more resistant to chips at the edge than a 2 cm slab.
If your kitchen has an island plus perimeter counters, ask your fabricator whether one full granite slab or two slabs from the same bundle will be needed. Booking both slabs from the same bundle at the same time prevents the color-mismatch problem of sourcing a second slab weeks later when matching inventory may be gone.
Lighting is the most underestimated factor in granite slab selection. Warehouse artificial light flattens color and drains warmth from stones like New Venetian Gold, Giallo Ornamental, and Colonial White. Natural light from an overcast day is the ideal viewing condition for outdoor yards — bright sun washes out veining, and a recently rained-on slab absorbs water and looks artificially darker than its true installed color. Move each candidate slab into the best available natural light before making any judgment on granite countertop colors.
Once you have the slab positioned in good light, wet the surface with your spray bottle or damp sponge. A wet slab looks dramatically richer and deeper — this is the closest approximation of how the stone will look after professional sealing and installation. Dark granites like Absolute Black and Black Galaxy, and gold-toned stones like New Venetian Gold and Venetian Gold, are especially misleading when viewed dry. The wet-slab trick takes 10 seconds and prevents a lot of post-install disappointment.
Hold your cabinet door sample and paint swatch up against the wet slab at the same time. This is how you evaluate whether a stone's warm brown and gold tones complement light cabinetry or whether the blue pearl veining in a stone works with your gray cabinets or fights them. Photos and memory cannot replicate this comparison. Physical samples against the actual stone, in actual natural light, are the only reliable method for judging how granite's natural beauty will interact with the rest of your kitchen.
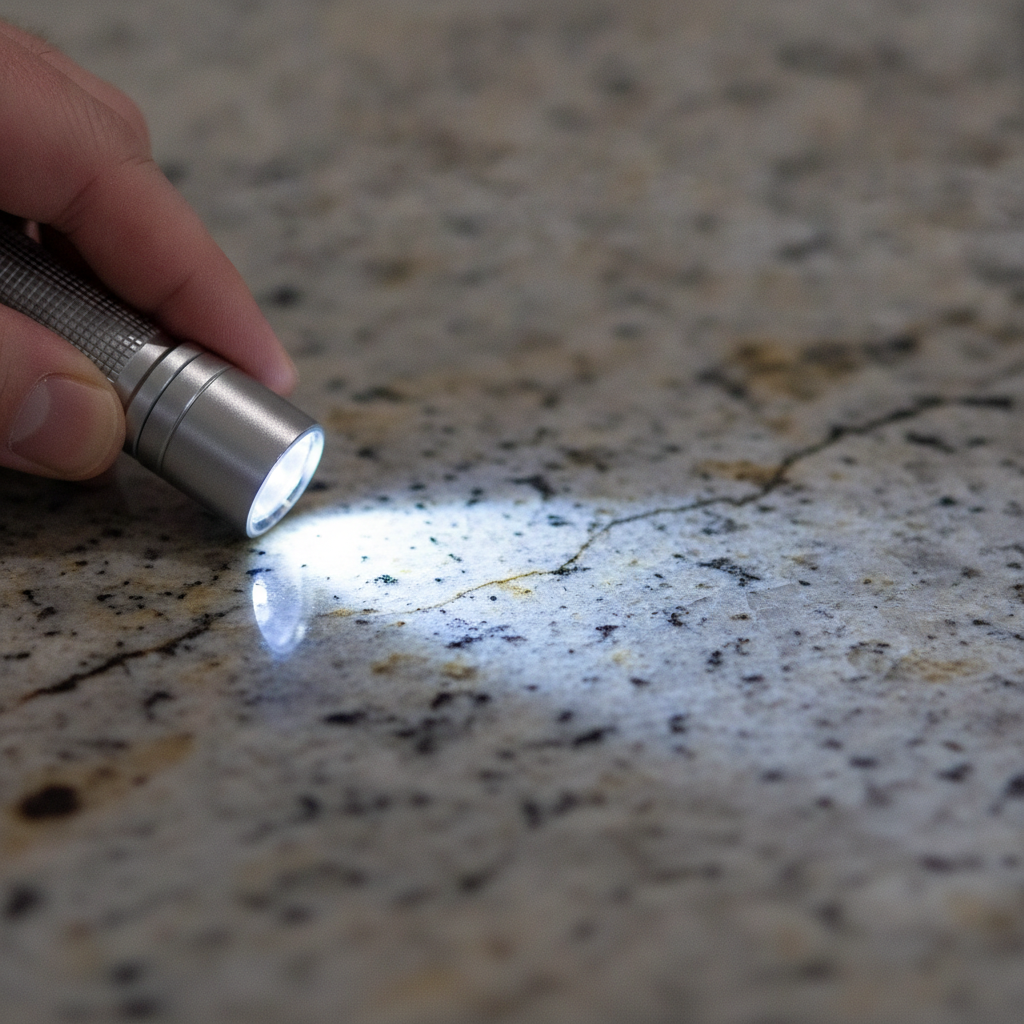
Hold your LED flashlight close to the slab surface and angle it low — nearly parallel to the stone. This raking light technique makes fissures, repaired cracks, resin fills, and surface pits visible that overhead warehouse lighting completely hides. Run the beam slowly across the entire face of the slab, not just the center. Edges and corners are where handling damage concentrates, and a chip or crack near an edge can fall right inside a visible section of your finished countertop.
The critical distinction to understand is fissures versus cracks. A fissure is a naturally occurring, shallow, wavy line that follows crystal boundaries within the stone — it does not compromise structural integrity and is completely normal in natural stone. A crack is a true break caused by mishandling or transport stress, and it will cause problems over time. The field test is simple: run your fingernail across the line. If the surface is smooth, it is a fissure. If your nail catches or drags, it is a crack. Walk away from slabs with cracks.
Also look for resin repairs — areas where the fabricator or quarry has filled surface voids with colored epoxy. Small repairs are common and generally acceptable. Large resin patches that span a section visible in your finished kitchen are worth flagging with your fabricator before committing. Greg Fox's observation that 50% of granite slabs have a significant defect is not an exaggeration — it is why this inspection step matters on every single piece, even ones that look perfect from six feet away.
Fingernail test for fissures vs. cracks: drag your fingernail slowly across any line you see in the stone. Smooth means fissure — natural, harmless, fine to proceed. Nail catches or drags means crack — do not purchase this slab, regardless of how beautiful the granite colors are.
Granite comes in hundreds of colors across a wide selection of granite types, but the selection process gets cleaner fast when you anchor it to your cabinets and flooring. White Ice and Colonial White granite options pair well with dark or gray cabinets, creating contrast that makes both the countertops and cabinetry stand out. Warm-toned stones — New Venetian Gold, Giallo Ornamental, Venetian Gold — complement cream, beige, and wood-toned cabinets in traditional and transitional kitchens and add warmth to the room. Black granite choices like Absolute Black and Black Galaxy work as a dramatic focal point in contemporary kitchens with white or light cabinetry, creating a sophisticated, high-contrast look.
Consider the movement and patterns in the stone relative to the size of your kitchen. A slab with bold, sweeping veining can feel busy in a small kitchen where counters are broken into short sections — the same slab becomes a striking focal point on a large island and creates an inviting atmosphere. Stones with small flecks and tighter patterns — many brown, beige, and green granites, for example — read cleanly at any scale and are a popular, reliable choice for high traffic areas where visual calm matters. Blue granite options with blue pearl veining add a distinctive look that pairs especially well with white or warm wood cabinets.
Finish is a real functional choice, not just an aesthetic one. A polished finish amplifies color, reflects natural light back into the kitchen, resists stains well, and is easy to clean with a microfiber cloth and mild soap — avoid harsh chemicals regardless of finish. A matte finish (honed or leathered) softens the look and hides fingerprints and smudges better day to day, useful in busy kitchens. Leathered finishes on dark granites are especially popular right now because they add texture and warmth without a glossy sheen. Granite is also heat resistant and durable enough to handle hot pots and hot pans set directly on the surface — though trivets are still recommended to protect the sealant over time and prevent stains from cooking residue.
Every granite slab is unique — there is no other one exactly like it anywhere in the world. Once you find your perfect granite slab, place a hold on it before you walk out. Most stone suppliers require a deposit of 10-50% of the material cost to hold a slab for 30-90 days, and those deposits are often fully refundable if your project falls through. Failing to place a hold risks losing the piece to another buyer before your fabricator completes templating.
Get the slab number and bundle number in writing from the yard before you leave. This is how your fabricator confirms they are pulling the exact piece you selected — not a neighboring slab from the same bundle that looks similar but has different veining or patterns. The number is your proof and your protection.
If you are deciding between two granite options, hold both for a short period while you finalize your choice. The cost of holding a second slab for two weeks is almost always less than the stress of second-guessing your selection after installation. Granite countertops in a standard Central Texas kitchen run $2,400-$6,000 installed as of 2026; open-concept layouts with large islands commonly reach $3,800-$7,500. Getting the selection right is worth the small insurance cost of a dual hold.

A full granite slab weighs 800 to 1,200 or more pounds and is stored vertically on an A-frame rack. Tipping or shifting a slab without proper equipment is a crush hazard. If you need to see the full surface of a slab — back, edges, or a piece stored behind other stones — ask yard staff to use a forklift or pull it forward. They do this all day and have the right equipment. Never reach between slabs or attempt to reposition them yourself.
Ready to get started? Contact Fox Granite today.


BY APPOINTMENT ONLY
1379 Wald Road
New Braunfels, TX 78132
Austin, San Antonio, Cedar Park, Kyle, New Braunfels, Del Valle, Elgin, Lago Vista, Shady Hollow, Onion Creek, Buda, San Marcos, Lockhart, Temple, Wimberley, Dripping Springs, Bee Cave, Lakeway, Leander, Anderson Mill, Jollyville, Spicewood Springs, Round Rock, Georgetown, Pflugerville, Manor, Taylor, Manchaca, Mountain City, Hutto, West Lake Hills, Bastrop, Liberty Hill, Driftwood, Sun City, Steiner Ranch.